Portrait photography lighting
Lighting for portrait photography: Put your portraits in the right light
Portrait photography is one of the most popular genres of photography and is associated with a high level of fascination. Good portrait photos are atmospheric and convey the essence of the person being photographed. Effective recordings can be made outdoor, for example, but the studio also offers many opportunities for professional portrait photos.
In order to take beautiful portraits, there is a large selection of aids for photographers in stores - especially for setting up portrait lighting. But although lighting is very important for portrait photography, beginners do not necessarily need an extensive arsenal of equipment. It is of great importance to know the basics of portrait lighting and to choose your equipment for portrait photography appropriately. Read here how to work properly with light when taking portraits and what you should pay attention to in this regard.
The important things first
• There are different types of lighting for portrait photography, such as daylight, clip-on flash, studio flash and continuous light.
• Not only the types of light influence the image effect, but also the set-up for the portrait lighting - that is, the position of the individual light sources.
• Depending on which lighting technology you choose, very different effects can be achieved in the portrait and you can emphasize or conceal certain areas.
What types of light are there?
First of all, it is interesting to know which types of light exist for portrait lighting. A basic distinction is made between daylight, clip-on flash, studio flash and continuous light for portrait photography.
Daylight (Available Light)
For portraits outdoors, daylight is often sufficient as a light source. Natural sunlight - possibly in addition to a reflector - makes portraits look atmospheric. Here you can experiment a lot and, for example, take portraits against the sun. A reflector ensures that the face is evenly illuminated against the somewhat burnt-out background. This creates an attractive impression.
In the photo studio, too, natural daylight can at least be used in addition to artificial light. The natural light makes the portrait look soft and atmospheric. Of course, you need a window to use the daylight. The problem is that natural light is not as controllable as artificial light. Beginners in particular often have difficulties working with the daylight. The rule here is: Practice makes perfect. Don't give up just because you can't implement your ideas right from the start. Try different set-ups and improve your result until you are satisfied.
Attachment flash
The camera's internal flash is unsuitable for portrait photography, but a clip-on flash can achieve acceptable results. It is more powerful and properly illuminates the scene in front of the camera. In addition, it offers you more flexibility than the internal flash, as it can usually be swiveled. For example, you can flash against the ceiling to provide softer lighting. The clip-on flash is ideal for small photo studios. It can be easily mounted on the camera and is immediately ready for use. Often you can also use the clip-on flash individually. Only in larger photo studios is this flash often not powerful enough.
Studio flash
In the case of a studio flash, the flash tube protrudes from the device. The light is therefore distributed in all directions. This is ideal for large photo studios. The flash can be connected to a power source and combined with different light shapers. For example, you can use softboxes, reflectors or spot attachments for your portrait lighting to specifically generate soft or hard light. Studio flashes are particularly suitable for ambitious amateur photographers or professionals, because they are designed for continuous use.
Continuous light for portrait photography
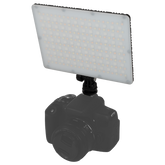
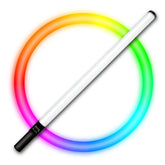
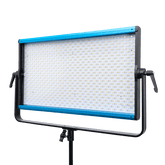
A flash only illuminates the scene at the moment of taking the picture. With a permanent light for portrait photography it is different: this light source remains switched on all the time. This is a big advantage, because you can see the effect the light has on the portrait before you take the picture. Continous Lighting can be handled flexibly and in a user-friendly manner. However, it can lead to a large amount of heat being generated in continuous operation.
Different light set-ups
Different light settings are suitable for the portrait lighting setup, with which you can get the best out of your recordings. In the next sections you will find out which light set-ups are possible for your portrait illumination.
Flat light
Flat light is the easiest option for good portrait light. The light comes directly from the front of the camera. With this lighting technology, there are hardly any shadows on the face. The complexion appears flat, the facial contours are flattened and the facial features hardly have any ups and downs. This is why the set-up is ideal if you want to correct an uneven complexion on your model. Even if you use hard light, you can take powerful photos with the flat light technique.
Paramount (butterfly light)
This lighting technique originates from film and television and was used for Hollywood productions in the 1950s. The lighting hits the person who is to be recorded from the front, but at a slightly higher level. This gives the nose a butterfly-shaped, symmetrical shadow. This is why this light set-up is also called a butterfly light. The light makes the model's eyes look expressive and highlights the cheekbones. The lips also appear fuller. The light source must not hang too high, because that would lead to dark eyes.
Split light
As the name suggests, this setting of light results in a face that looks like it's split in half. The light falls strongly from the side on the person, so that one half of the face is brightly illuminated and the other half is completely in the dark. Additional shadows can be avoided by not placing the light source too high. A light shaper that is at face level is also recommended. This light set-up makes the portrait appear dynamic and exciting. Make sure, however, that pores, skin imperfections and wrinkles become more noticeable with this lighting technique.
Broad Light
With this set-up, you illuminate the side of your face that faces the camera - i.e. the wider half of your face. The narrower side, on the other hand, disappears in the shadow. Broad Light is a softer alternative to Split Light. This set-up is particularly popular in video productions, as it mimics natural window light and movements are not a problem. With this light setting you have to make sure that the eye facing away from the camera does not get too dark and lose its highlight. A small reflector or brightener can help.
Short Light
Another possibility for a good portrait light in the studio is the short light. It's the opposite of Broad Light. You illuminate your model in such a way that the half of the face facing the camera is darkened, while the narrow side is illuminated and thus highlighted. Often you need a brightener or another light source here to avoid a shadow that is too harsh. This lighting setup in the studio is perfect for taking an exciting and impressive portrait.
Loop light
With the Loop Light, the light source is mounted centrally in front of or slightly above the model. This is then moved a little to the left or right. In this way, the nose shadow shifts to the opposite side - and looks like a loop. This rather complex lighting technology has a number of advantages: The shifting of the light to the side gives the photo tension and dynamism. One side of the nose automatically becomes dark, which gives the portrait depth and is also pleasantly skin-flattering.
Rembrandt light
The artist Rembrandt preferred dramatic light set-ups for his drawn portraits. In order to generate the Rembrandt light, you have to position the light source similar to the Loop Light - but further to the side. The loop shadow of the nose should coincide with the shadow of the cheek. On the half of the face that is turned away from the light, a small, illuminated triangle is created below the eye. This is the typical feature of Rembrandt light.
What equipment do you need for portrait photography?
Of course, beginners don't want to invest so much money to start portrait photography. However, every portrait photographer should have the following equipment for portrait photography:
The right lens
When choosing a lens, first pay attention to the focal length: For a blurred background you need a small distance to the model and a long focal length. Longer focal lengths are therefore well suited for classic portraits. A light wide-angle lens, on the other hand, is ideal if you are aiming for scenic portrait photos that also capture the surroundings. In addition, it depends on the light intensity: the further the aperture can be opened - i.e. the smaller the maximum possible aperture value - the more blurred and softer the background becomes.
Tripod
An open aperture requires that you hold the camera very still. Otherwise your photo will not be in focus. It is therefore generally advisable to work with a tripod in portrait photography. It doesn't have to be an expensive tripod. A table tripod is also a good alternative for amateur photographers.
Collapsible reflector
Regardless of which light set-up and which type of light source you ultimately decide: a collapsible reflector is always recommended. This removes unsightly shadows and makes the light appear softer. Instead of a professional collapsible reflector, you can also use a sheet of white paper. Experiment with the reflector and hold it at different angles in the light to find out how it affects the portrait light.
More tips for portrait photography
In addition to portrait lighting, there are a few other tips that you should consider when taking portraits in order to get really lively and atmospheric photos:
• Interactions: Make sure that your model is always busy. Give directions or make it work with accessories.
• Assistant: Ask a friend or family member to help you with your portrait shoot. Your assistant can take care of the arrangement of the objects, keep an eye on the model's hair and take on small auxiliary work.
• Stay relaxed: If you want your model to relax, you should also appear calm and calm yourself. Show that you enjoy the shoot and enjoy your work. Then your model will also relax - and that is the best basic requirement for great and impressive pictures.
• Change perspective: In portrait photography, perspective is crucial. Often it is enough to change them only minimally in order to create a completely different portrait expression. Try out how it looks when the lens is a little above the model's eye level. A picture from below can also make the portrait look very interesting. There is no right or wrong here - experiment and see the differences.
Conclusion: good light is essential for professional portraits
The portrait lighting setup is important for successful portraits. By working with different lighting sources and set-ups, the portrait light can be influenced - and thus ultimately the entire image effect. Which type of portrait lighting is right for you depends on what goal you are pursuing with the shot. It is best to experiment with different settings to emphasize or hide parts of the face. The equipment for portrait photography does not have to be expensive. Often it is enough to get on board with little equipment such as a clip-on flash, a reflector and a photography LED Panel. If you also use the daylight, you have good prerequisites for impressive portraits.


