LED Greenscreen Lighting
Illuminate green screen - tips and tricks for perfect green screen videos
A green screen studio gives you as a video producer the opportunity to incorporate impressive effects into your films. While the technology used to be reserved for professionals only, it is now also enjoying great popularity among semi-professional filmmakers: Many videographers who record videos for YouTube or Facebook have already recognized the advantages of a green screen. No wonder: with the right equipment and a few tricks you can conjure up a studio out of a small room that opens up many possibilities. Before you can start, you have to set up your green screen studio as optimally as possible. There is a lot to consider in this regard, especially when it comes to lighting.
The important things first
- A uniformly illuminated background surface is the be-all and end-all for your green screen lighting, otherwise you will run into problems later when you are working on the material.
- It is important not to falsify the color by the light, but to create the right shade of green.
- Furthermore, reflections should be avoided as much as possible, as they significantly disrupt the overall impression.
- Another no-go are hard shadows. Make sure to keep the shadow edges as soft as possible.
Requirements for good green screen lighting
If the green screen is poorly lit, this is usually not indicated during the recording, but only when you want to edit your material later. An unfavorable chroma key shoot means that you have to put in a lot of subsequent work. Because: The object that you want to cut out does not stand out well from the background or can hardly be separated from the green tone of the background. As a result, undesirable effects such as spill almost always occur. You can save yourself this time-consuming extra work by observing a few things when setting up your green screen studio. With the right preparation, you create the best conditions for simple and effective green screen lighting.
The first step is the right surface. Suitable backgrounds for the studio are blue (blue screen) or green (green screen). These colors are ideal for the chroma key shoot because they don't appear in natural skin tones. Regardless of which background color you choose, similar principles are necessary for lighting. As a rule, however, green screens are used. A blue screen is only more suitable if the person standing in front of the camera has to or wants to dress in green. Apart from that, modern camera technology has focused on green pixels. They can collect more image information than blue pixels. In addition, blue eyes look unnatural in front of the blue screen, which leads to additional work in post-processing. The following applies: With a green background you are correct in most cases.
In addition to the hue, it is important that the surface of your background is as even and smooth as possible. Painted walls are well suited, but fabric or paper are also suitable if they meet the requirements mentioned. You should keep your hands off wrinkled cloths or highly reflective surfaces, because then the background will not appear smooth and even. Pop-outs are suitable for mobile use. They can be folded up and automatically fold out with just a few folds when opened. The gray fabrics are provided with green reflectors. So you need a green light to get the green color.
What to look out for when illuminating the green screen?
Once you have found a suitable background, the chances of good green screen lighting are good. This is important because otherwise your film will appear inferior and unconvincing. In fact, the best camera is of no use if you save on the right lighting. It is therefore worth investing some time for research and money for good equipment such as suitable continous lightig for green screens. When illuminating the green screen, it is important to avoid shadows on the background. In addition, the person himself must be well lit.
Uniform illumination of the entire green area
Diffusers are essential to ensure that the entire wall surface is well illuminated. These may swallow a little light from your green screen lamps or green screen LEDs, but at the same time ensure that the light is scattered. The background is thus illuminated more evenly. A waveform monitor or spot metering can be used to determine any unevenness in the color. They are usually included in professional recorders and field monitors. Apps for Android or Apple are cheaper and ideal for amateurs. This allows you to see relatively well with your smartphone or tablet whether you have achieved good green screen lighting. Even with simple and free tools like iMovie, you can turn a decent green screen into a transparent alpha channel these days.
Avoid mixed light
There are various specific lighting concepts for good green screen lighting, which we will explain to you later. We still have one important piece of information in advance: mixed light is to be avoided in any case. It occurs when multiple light sources with different color temperatures are used. The color temperatures are given in Kelvin. In colloquial language, one differentiates between colder and warmer light. Light sources with a color temperature of around 5500 Kelvin are best suited, because this corresponds to natural daylight.
But how can mixed light be avoided? There are several ways to do this: On the one hand, you should only use lamps with the same color temperature. If daylight is to be used, then opt for a color temperature of 5500 Kelvin for the artificial light. This works best with green screen LEDs, where you can set the color temperature. In addition, you should always switch off the normal room lighting, as it leads to a mixture of several color temperatures.

The right green on the green screen
An important basis for good green screen lighting is to know that green is not just green. There are different nuances and levels of brightness. It is all the more important to hit the right green with your lighting. The main thing is to create the shade of green that your camera demands. This is exactly what distinguishes green screen lighting from the lighting of an ordinary scene. If the light is off, the green in the camera looks black. On the other hand, if too much light is used, the camera will perceive it as almost white.
To get the best green for your video recording, test strips or color bar images are useful. They help determine the ideal shade of green. It is best if your camera can display the color bar. In addition, a waveform monitor and spot measurements help, which are not missing in professional cameras anyway. If you have a model without these extras, you need an additional device such as a field monitor. Possible test images are, for example, the SMPTE test image or the EBU 75 and 100 percent test image. In our region, the EBU color bar image with divided white bar is particularly widespread at 75 percent.
If you have a suitable test image, you can use it to analyze the green. You do this with the spot metering, because it provides you with a color code. You get the saturation in percent with the waveform monitor. If you have these values, you can align your entire lighting with them. In this way, you achieve exactly the green tone that your camera needs and you have much less to do with post-processing later.
How are lights positioned?
Now we come to the question of how many lights you need for good green screen lighting and how you can best place them in your studio. There are different concepts for this. Which variant you choose depends primarily on your budget.
Inexpensive entry: two light sources for green screen lighting
You can achieve the cheapest type of green screen lighting with two green screen lamps. This variant is particularly popular with beginners. You need two artificial light sources that illuminate the green screen at an angle of approximately 45 degrees. Another light source is also used: natural daylight. It is used to illuminate the person standing in front of the green screen. So it really has to be close to a window for the concept to work and for satisfactory results to be achieved.
Three light sources for good illumination
We generally recommend at least three light sources for very good illumination of your green screen. As with the first variant, the green screen is illuminated with two lamps at a 45 degree angle. In addition, a third lamp is used from the front. A ring light, for example, is suitable for this. If necessary, the concept can also be supplemented with natural daylight, provided that your green screen lamps have the right color temperature. For more information you can read our article about three point lighting.
Ideal for green screen lighting: 5 light sources
If you want to achieve professional results, have enough space and a large budget, 5-point green screen lighting is ideal. Two lamps illuminate the green screen and three more lamps illuminate the person in front of it. One of these three lamps serves as a spotlight and is positioned behind and slightly above the person. This increases the contrast between the background and the person. This helps to easily expose fine structures such as hair later.
What kind of lighting do you need?
Experience has shown that three lamp systems have proven themselves for green screen lighting:
We will go into the individual options in more detail below.
Soft boxes
Softboxes are inexpensive and perfect for even illumination. You can use it to illuminate both the green screen and the person in the foreground. The result is very soft, pleasant light. Three softboxes are enough for an attractive lighting of your green screen. However, the softboxes also have a disadvantage: They are very large and therefore need a lot of space. This is not ideal for small studios. In addition, the construction is difficult and takes longer compared to green screen LEDs.
LED video lights
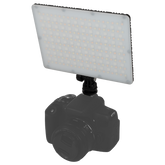
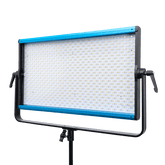
Green screen LEDs are the right choice if you are looking for a compact solution. They are powerful and versatile. High-quality models can be used with a power cable or battery as desired. In addition, the video lights usually give you the option to change the color temperature. The brightness can also often be adjusted. However, video lights are more expensive compared to softboxes.
Ring lights
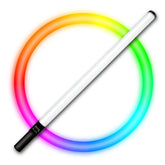
A ring light is not really suitable for the green screen, but rather to illuminate the person in front of it. You can achieve very nice results, for example, with two softboxes or two video lights and a ring light. It can be placed directly in front of the person to be recorded. The advantage: a ring light is sufficient to illuminate a person without shadows. However, the ring-shaped light is reflected in the pupil. Some filmmakers find this effect beneficial, others disruptive.
Conclusion
So you see: Well-positioned green screen lighting with the right light sources contributes significantly to achieving professional results with your green screen videos. Which lighting concept and which light source you choose always depends on your studio, your set-up, your project and your budget. For product videos, for example, you need a different lighting concept than for an interview.
In any case, it is important: The area of the green screen must be evenly illuminated. Reflections are disturbing and should be avoided. This is exactly why softboxes are ideal for beginners. It is also important to coordinate the color temperatures of the light sources so that no mixed light is created. If you take these tweaks into account, you will see that you have a lot less post-processing effort. This way you will achieve really high quality and impressive green screen videos.
If you need help with your Greenscreen Lighting, don´t hesitate to contact us via mail, Whatsapp or by phone.


